How to Make a St. Patrick's Day Postcard

Treat a Friend to a Handmade Postcard
Postcards are fun and easy to make yourself, and you don't have to spend money on buying a card or the extra postage it takes for a letter. Here I will show you how to make a fun and cute postcard for St. Patrick's Day!
Materials:
- Cutouts and stickers
- Colorful scrapbook paper or card-stock
- Elmer's Glue
- Scissors
- Postcard Stamps
- Scrapbooking pen

Step 1: Pick Out Scrapbook Paper
First, pick out some scrapbook paper that you would like to use for the background of your card.
I had this pad of paper on hand and it's the perfect size for a postcard, so I used this.
I selected a green floral sheet of paper for the front side of my postcard, because it looked vintage and I thought it was pretty.
This would also be a great way to use up extra, random scraps of paper!

Step 2: Find Free Clip Art or other Cut-Outs (Google Images or Other Source)
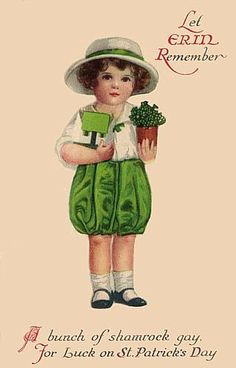
I did a simple search on Google Images under "Vintage St. Patrick's Day" and these cute little kids popped up, along with many other vintage St. Patrick's Day graphics and greetings.
Print and cut out the images you find that go with the theme of your postcard.
(You could also do this for other holidays such as Thanksgiving, Valentine's Day, Christmas, Easter, and so on).
Don't have access to a printer? You can use stickers. I will go into more detail on that below, as I used stickers on the message side of my postcard.

Step 3: Paste Your Cut-Outs or Stickers on Front of Postcard
Now you can paste your cut-outs on the front of the postcard, or place your stickers on.
Feel free to doodle on the front, type out a greeting and paste it on, or do anything you think looks good.
I chose to arrange several different cut-outs on the front of my postcard and avoided writing directly on the card. I wanted to try and keep a vintage feel to it.


Step 4: Paste Another Piece of Cardstock or Scrapbook Paper on the Back of Postcard
This is to ensure that the card is thick enough. It's also so that you can write your message on the other side.
I chose a piece with green lines on it, to match the front side of the postcard.
I pasted it on, and then I cut out plain white paper, using special scrapbooking scissors with fancy edges. I pasted a couple of white rectangles of paper onto the postcard, one for where the address section, and one for the spot where I would write my message.
Now, decorate this side. I used some Snoopy St. Patrick's Day stickers.

Step 5: Write Your Message / Address the Postcard
Finally, after you've decorated both sides and the postcard is good and sturdy, write your message and address the postcard.
I tried to keep my message tied to the theme of St. Patrick's Day so that it would be more fun.
I used a scrapbooking pen to write the message, so that it would stand out and look nice, but you can use whatever you have handy or whatever catches your fancy.
This concludes my hub on making your own handmade postcard for St. Patrick's Day. Hope you enjoy!